Kubernetes Clusters Are Here: Connect Once, Manage Every Collector From Bindplane
Connect a cluster through the OpenTelemetry Operator, then add, change, and remove collectors without applying another manifest.

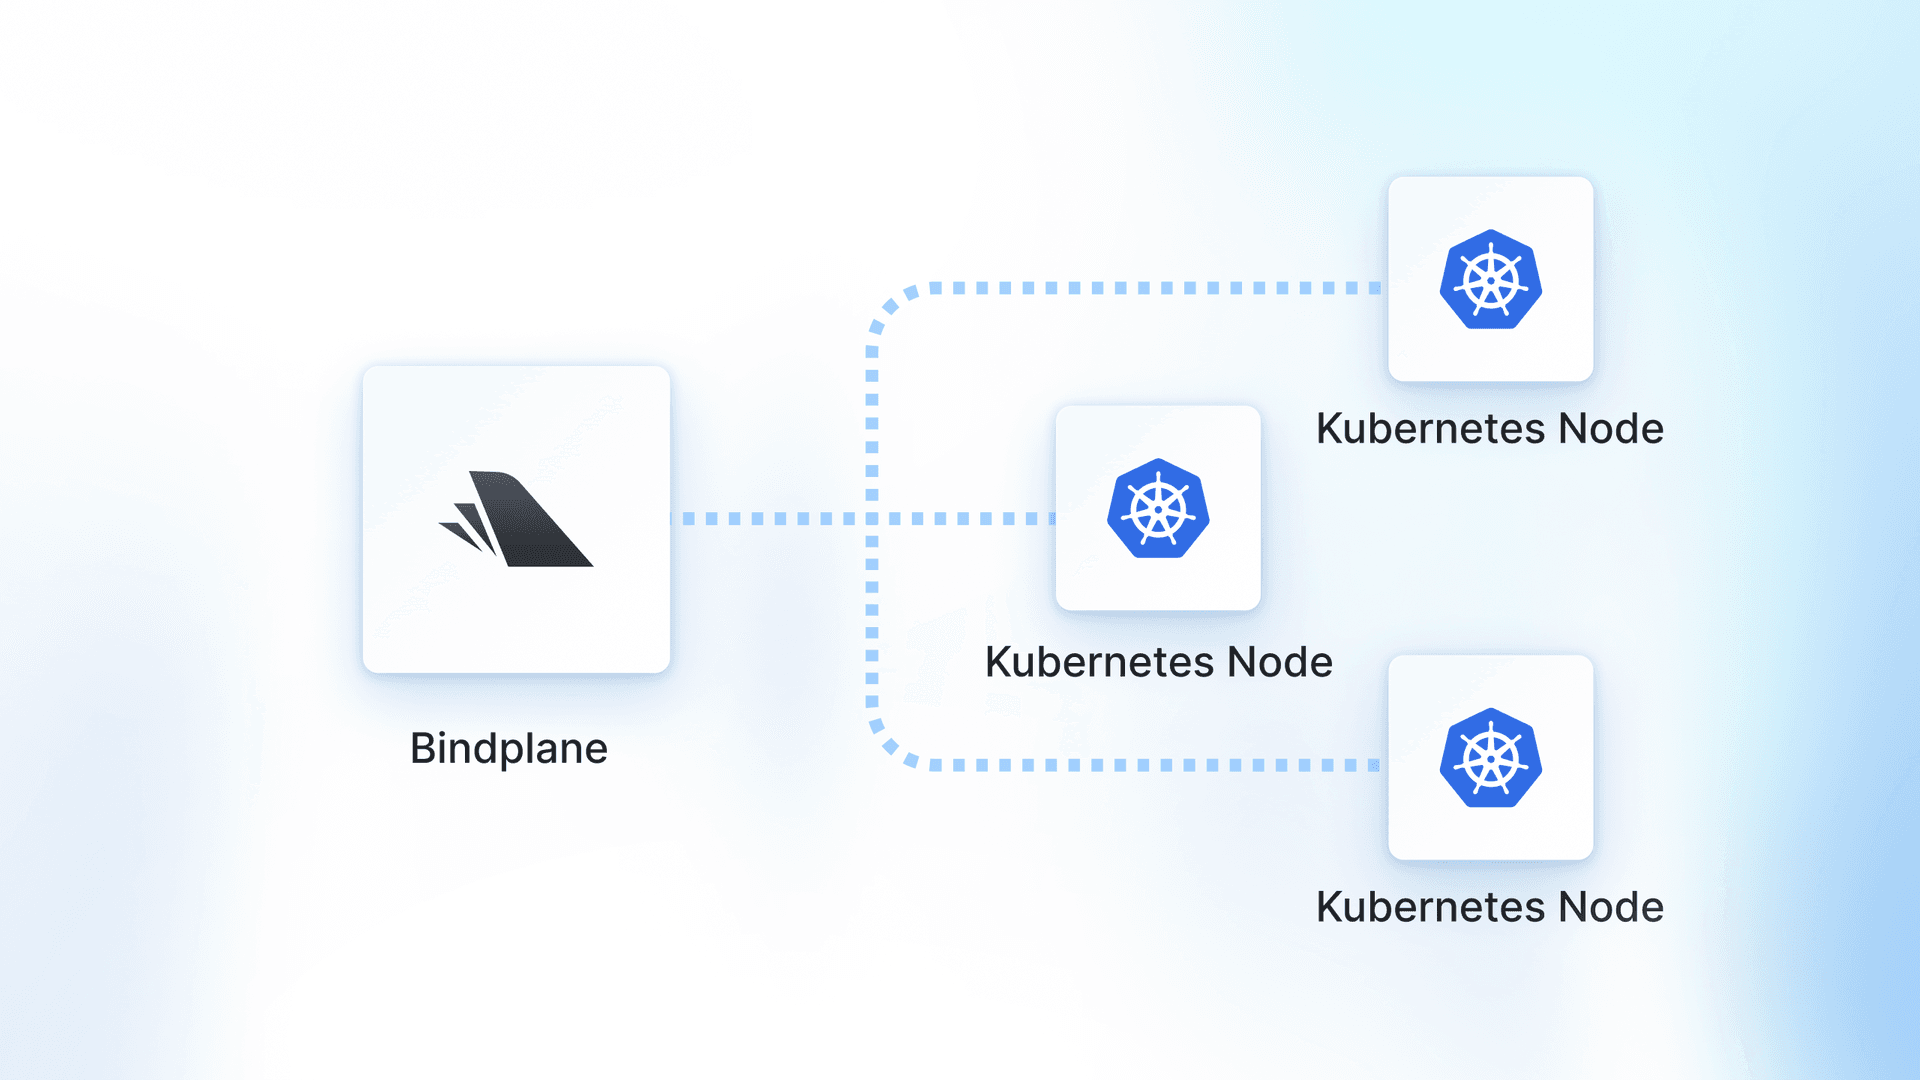
Running OpenTelemetry collectors in Kubernetes means owning manifests. A DaemonSet for logs, a Deployment for cluster events, a gateway with its own Service, RBAC, and autoscaler.
Bindplane already manages the configuration inside those collectors. The workloads around them were still yours to template, apply, and clean up.
Not anymore.
Kubernetes Clusters is now in beta. Connect a cluster once through the upstream OpenTelemetry Operator. After that, every collector is a Collector Workload you add, configure, scale, and remove from the Bindplane UI.

Connect Once, Then Stay in the UI
Three components run in your cluster. cert-manager issues webhook certificates. The OpenTelemetry Operator turns OpenTelemetryCollector resources into collector pods. The OpAMP Bridge connects out to Bindplane, applies your workloads, and reports health back.
The operator’s job is to run collectors. Bindplane’s job is to decide what they do.
Open Kubernetes Clusters, select Connect Cluster, and name your cluster.

Then run the four kubectl commands under Show Install Instructions. It takes about a minute.

Collectors Become Workloads
Select Add Collector Workload, pick a type, and name it. Bindplane creates the configuration, rolls out the cluster, and the operator starts the pods.
Three types ship to start.
- Kubernetes Node. A DaemonSet, one collector per node. Container logs and Kubelet metrics.
- Kubernetes Cluster. A single Deployment. Cluster events and cluster metrics.
- Kubernetes Gateway. A StatefulSet with autoscaling. OTLP traffic from your collectors and apps on
4317and4318.

Open a workload’s configuration, add sources, processors, and a destination, and select Start Rollout. You get the same Bindplane user experience as with your collectors running outside of Kubernetes.

One Gateway, One Set of Credentials
You could send straight to your backend from every node. That works. But then every collector holds your backend’s credentials.
Add a Kubernetes Gateway workload and Bindplane creates a Gateway, plus a destination that already points at its in-cluster Service.
<workload>-collector.<namespace>.svc.cluster.local
Edit the destination in your node and cluster workloads and point your apps’ OTEL_EXPORTER_OTLP_ENDPOINT at the same hostname. Filtering, batching, and credentials now live in one place.

From Manifests to Workloads
Until now, putting a Bindplane collector in Kubernetes went like this:
- Create a configuration
- Install Collectors and pick the Kubernetes platform
- Copy the generated YAML to a file, and run
kubectl apply
Then do it again, two more times. Node, cluster, and gateway collectors meant three manifests per cluster.
That works, and it still does. But once you applied it, the manifest was yours to manage. Bindplane rolled out the pipeline. The Deployment, the Service, and the autoscaler around it lived in a file you maintained by hand.
With Kubernetes Clusters you run kubectl once per cluster, not once per collector. Adding a collector is Add Collector Workload. Scaling a gateway is a field in Edit Collector Workload, with autoscaling on by default from 2 to 10 replicas. To remove one select Remove Workload, and the operator deletes its resources from the cluster.

The operator itself stays up-to-date the same way. When a newer release is supported, an Upgrade to button shows up next to the version on the cluster page. Read the upgrade docs, here.
Why It Matters
The pipeline was never the slow part of running collectors in Kubernetes. Bindplane already handled that with a rollout. The slow part was everything around the pipeline, and that lived outside the control plane.
Say you need Kubelet metrics from a cluster. Before, you’d generate a manifest, apply it, and go check the pods. Now you add a Kubernetes Node workload, add the source, and select Start Rollout. The Status column shows one collector per node when it’s done.
Say you don’t need it anymore. Remove the workload and the operator cleans it up. Nothing is left behind.
None of this replaces OpenTelemetry. It builds on top of it. The collectors are OpenTelemetryCollector resources managed by the community’s OpenTelemetry Operator. Bindplane tells it what to run.
Try It Today
Kubernetes Clusters are launched in beta and may not be enabled for every organization yet. If you don’t see it in the settings menu, the Kubernetes manifests still work.
You need kubectl v1.31 or newer and permission to create cluster-scoped resources. The feature guide builds a three-workload pipeline end to end. Read the docs.
Tell us what breaks and what’s missing in the Bindplane community Slack.
Kubernetes already runs your collectors. The OpenTelemetry Operator already knows how to manage them. With Kubernetes Clusters in Bindplane, you get both behind the same control plane as your pipelines, so the next collector you need is a workload you add, not a manifest you write.
Haven’t tried Bindplane yet? Sign up for free and connect your first cluster.

 Slack
 GitHub
 x.com
 LinkedIn